Why teachers use task boxes
Before we get in to ways to organize task boxes, it is important to understand why we need them.
There are many reasons for teachers of all subjects to use task box cards in their classrooms.
Primary teachers use these as activities to reinforce concepts, as early finisher activities, and in centers in their classrooms.
Middle school teachers can use them for concept reinforcement, for struggling students who need some extra practice, and for centers activities.
I have primarily used task box card activities for Special Education as they benefit students of all ages and abilities.
There are several reasons to use them in a special education classroom.
First, they are an excellent part of an independent work system in your classroom.
Second, they allow students of varying abilities to work on the same type of activity at a level that is individual to the student.
Third, they allow students to practice skills that need reinforcement.
Fourth, they allow me to focus on one IEP goal at a time.
Why do you need to organize task boxes?
In my classroom, task boxes are kept on a shelf or in a folder organization type system, depending on the size. There are different types of task box activities.
Some include task box cards that students use to match or circle answers on specific concepts.
Others are large activities that focus on job skills, fine motor skills, or other IEP goals.
The size and type of activity will dictate the type of storage solution you will use. Often you will have some of both.
It is important to have a system to organize task boxes for several reasons.
Independent work systems
When students are using task boxes in an independent work system, they need to be able to find the task that you want them to work on independently. To do this, you would need a system to organize task boxes in your classroom.
To do this, they have to know where to look for each activity. When you have task boxes labelled according to subject or activity, students will be able to find the task independently.
If students need support, I will use a hierarchy of prompts. This allows students to work toward finding tasks independently.
Early Finishers
When you use task box activities for early finishers, you want them to be able to get the activity and work on it without needing to come to you for help.
This allows you to be able to work with other small groups while the early finishers are engaged in specific activities.
This becomes easier for students when you organize task boxes in your classroom.
Centers
Centers are a great way for students to have a variety of activities to complete. These can focus on a particular concept or lesson.
Students work on activities in small groups. This gives you the opportunity to go around and work with students in smaller groups. A small group session can also be one of the center activities.
Setting up centers can be a lot of work. When task boxes are organized, and students understand the organizational system, your prep time for the centers is reduced.
Clean Up
For most teachers, the end of the day brings with it some exhaustion – mentally and physically.
The last thing I want to do after a long day of teaching is to reset the task boxes and prepare materials for the next day.
With organizational system in place, resetting the task boxes is much easier. I can tidy and reset the boxes without too much thought.
But aren’t task box storage solutions expensive?
There are some storage containers that look great but can be on the costly side.
The type of storage you choose can also depend on the shelves and amount of storage space that you have.
There are definitely some options that you can easily get from the dollar store without making too steep an investment.
Task Box Storage Ideas
Photo Box Storage
The photo box storage system for task cards seems to be very popular. It isn’t really a surprise why teachers like it so much.
It is easy to organize, task cards fit neatly inside, you can label the outside, have one box for each subject or skill, and it looks great.
Here is an example of a photo box storage system:
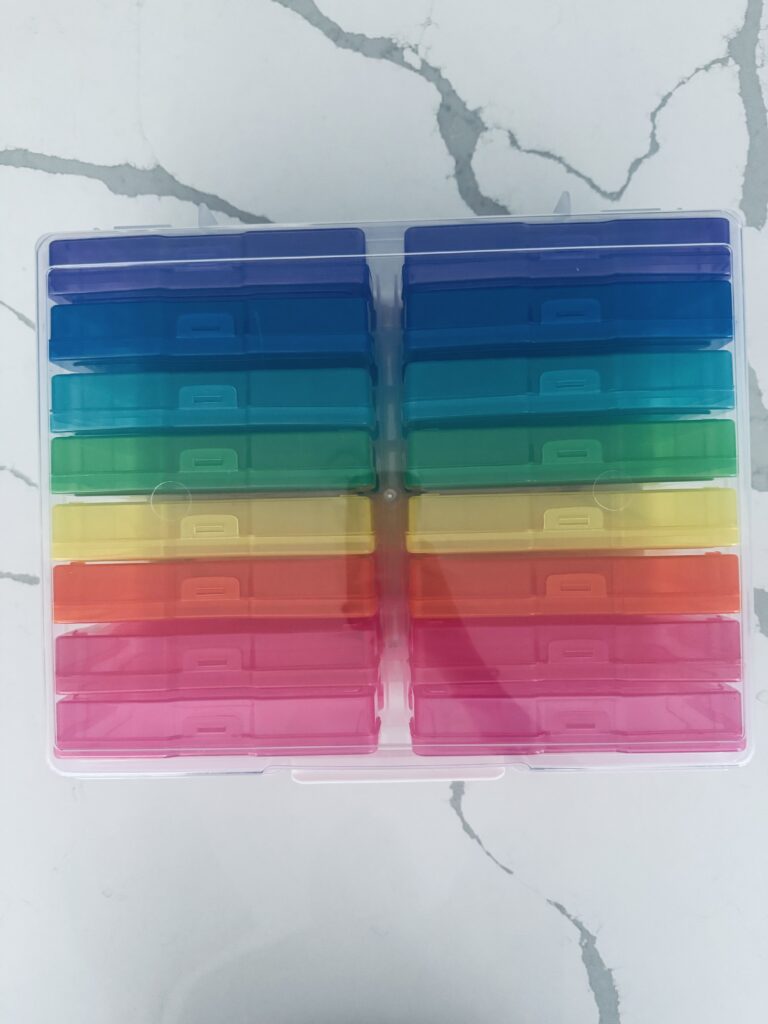
This photo box storage set comes in a clear plastic box so you can easily move it around.
It also comes in all clear boxes if you want the boxes to be consistent.
Here you can see how you would put the task cards into the boxes. Sets can include labels with the activity names.
Many Task Card sets that you purchase fit in these boxes.
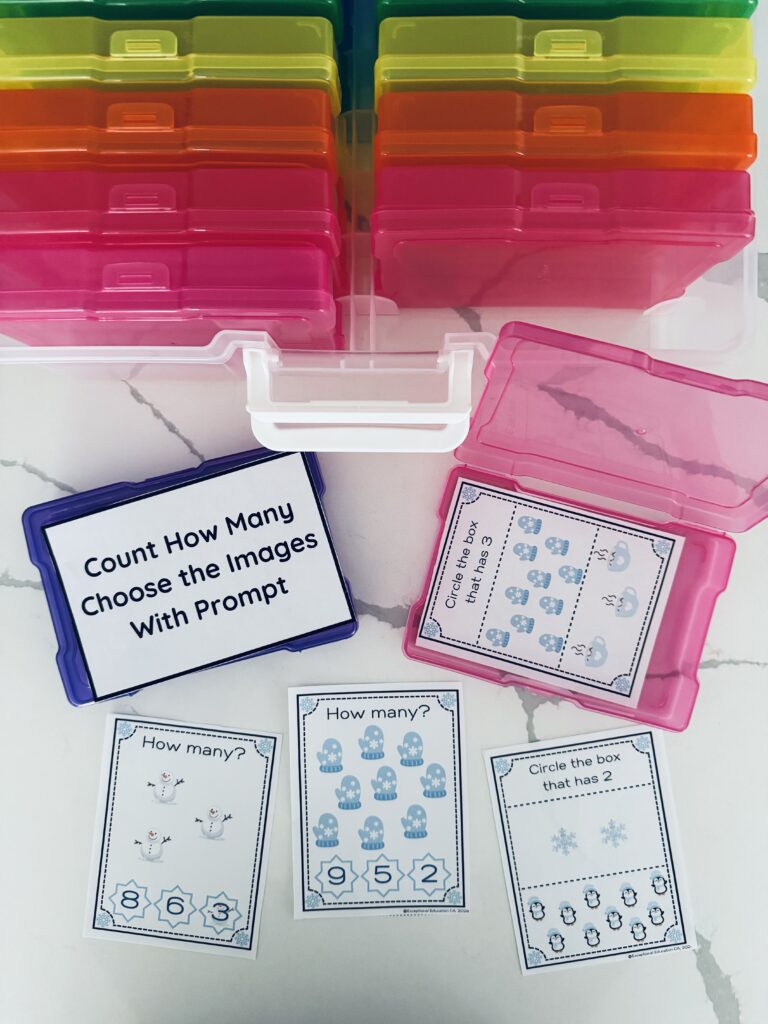
I purchased mine online, but there are several craft or department stores that have them as well. Mine cost around 30$ Canadian but I have seen them cheaper than that on sale.
Zipper Bag Storage
These zipper bags are more sturdy than the plastic ones you would use in the kitchen. I have used them for a while and not had any issues with them breaking or ripping.
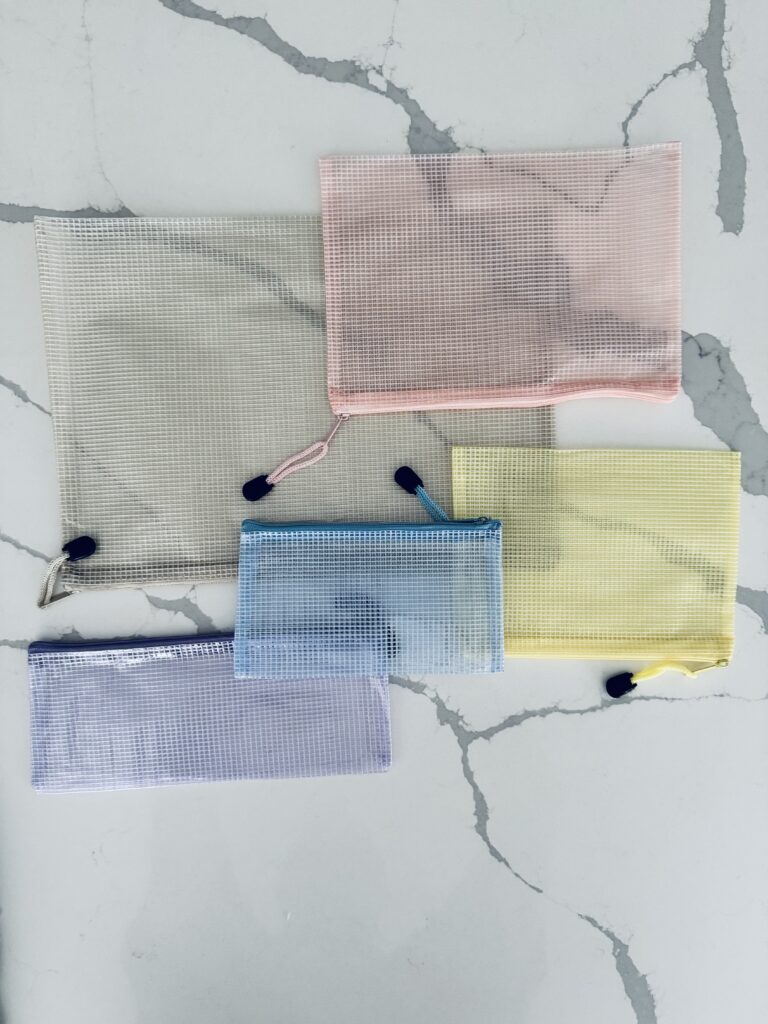
In addition to them being sturdy, they come in various sizes. This is great when you have different sizes of task box activities.
This particular size is great for the task box cards that fit in the photo box set. Once these are laminated, you can fit them in the zipper bag with a dry erase marker so that students have all items that they need in one spot.
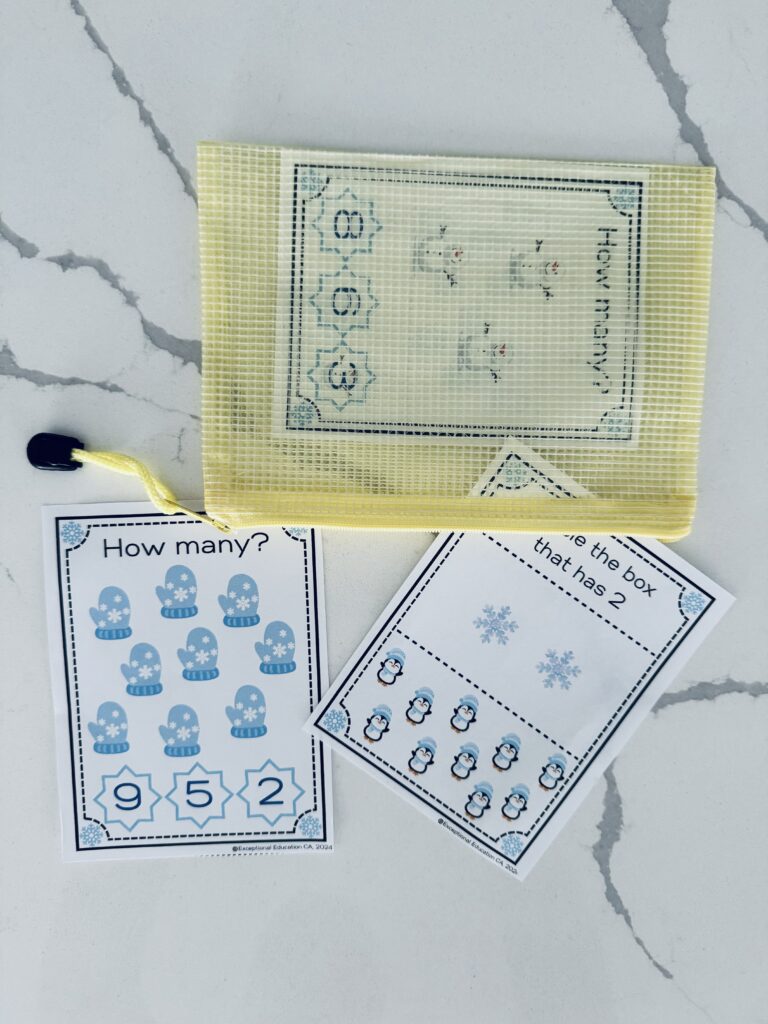
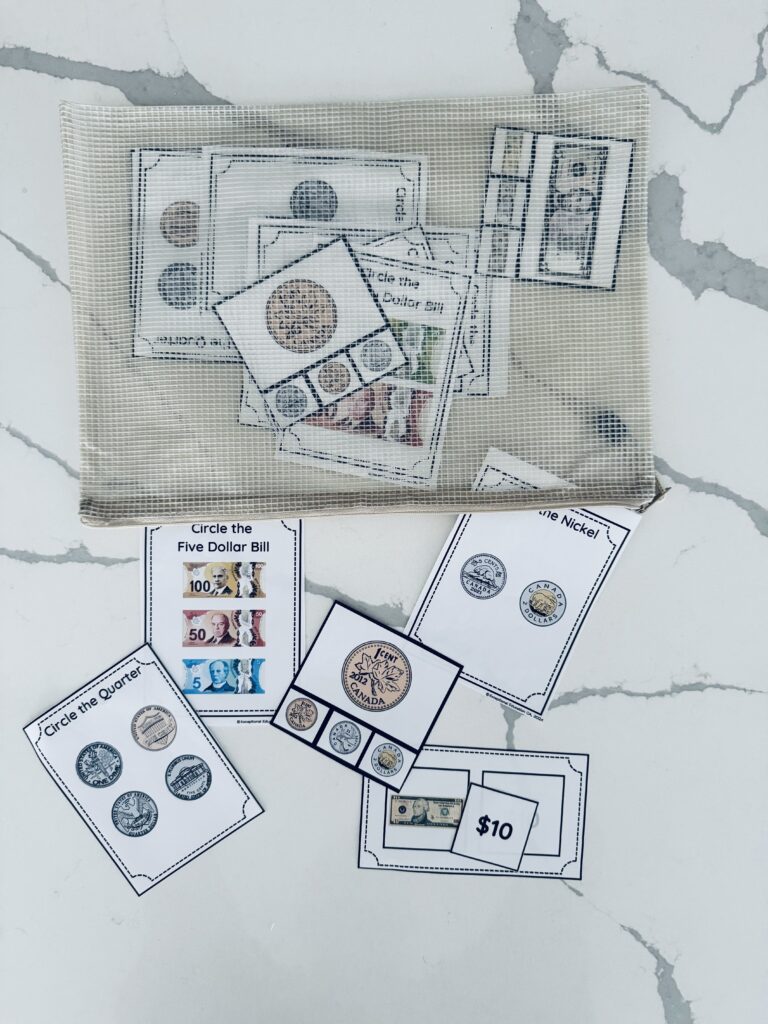
This medium sized zipper bag is great for giving students a variety of task box cards to complete at once. It can hold more than one of the photo storage boxes.
Not all of my task box activity card sets fit in the photo box case. Also, some of the job skills sets that I have for students contain large items (like winter gloves that need to be paired and folded).
I use the small ones for extra visual schedule labels and other small items that I need to keep track of.
Additionally, I get a large one for each student that I fill with a few tasks to be completed in their integration subjects.
If I can find one colour for each student, it is easy to change up their subject tasks.
I place these in a hanging folder holder by the door so students always know where to find them.
You can still use velcro to attach a task box label on the outside of the bag so that students can easily find the activity they need.
Plastic Bin Storage
When there are larger tasks, like job skills type tasks, you will need larger boxes. I typically find these for a reasonable price at the dollar store.
The challenge is that you need a shelf (I usually use a cubby style shelf) to store each of the boxes.
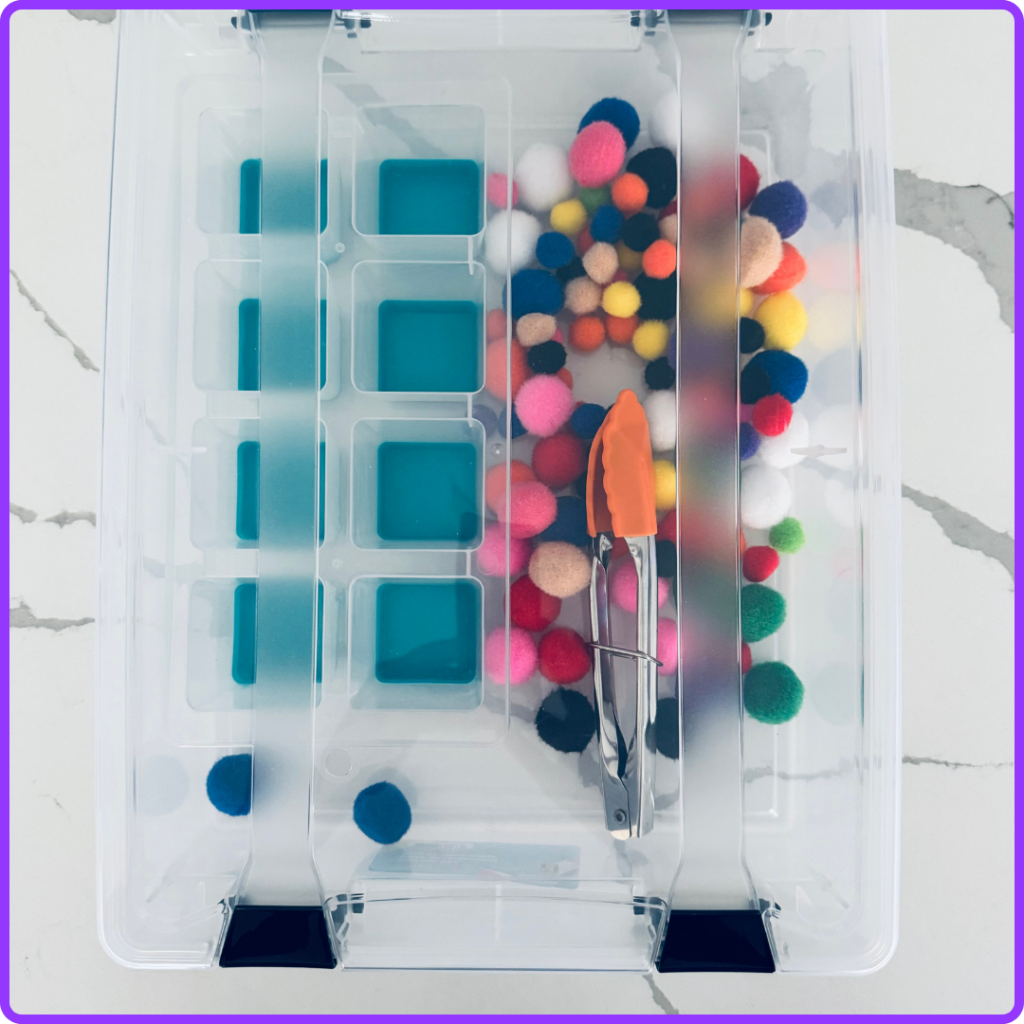
I tend to opt for clear boxes so that I can see what is in them.
This box has a colour sort activity. Check out this blog post for more details!
I will also place the task box labels on the outside of the box so that they can be reorganized and replaced without much effort.
Examples of tasks that I typically keep in larger plastic boxes are job skills type activities like replacing batteries in flashlights, putting toothbrushes in toothbrush holders, filling first aid kits, etc.
I will typically limit the number of larger task boxes that I have, rotating them when I need to change up the activity.
Kitchen Zipper Storage Bags
When I need something quick and inexpensive, I will grab a box of kitchen zipper storage bags (usually freezer size) from the dollar store for task box activities.
This is a medium freezer size bag, which fits the task box cards well, especially once they are laminated.
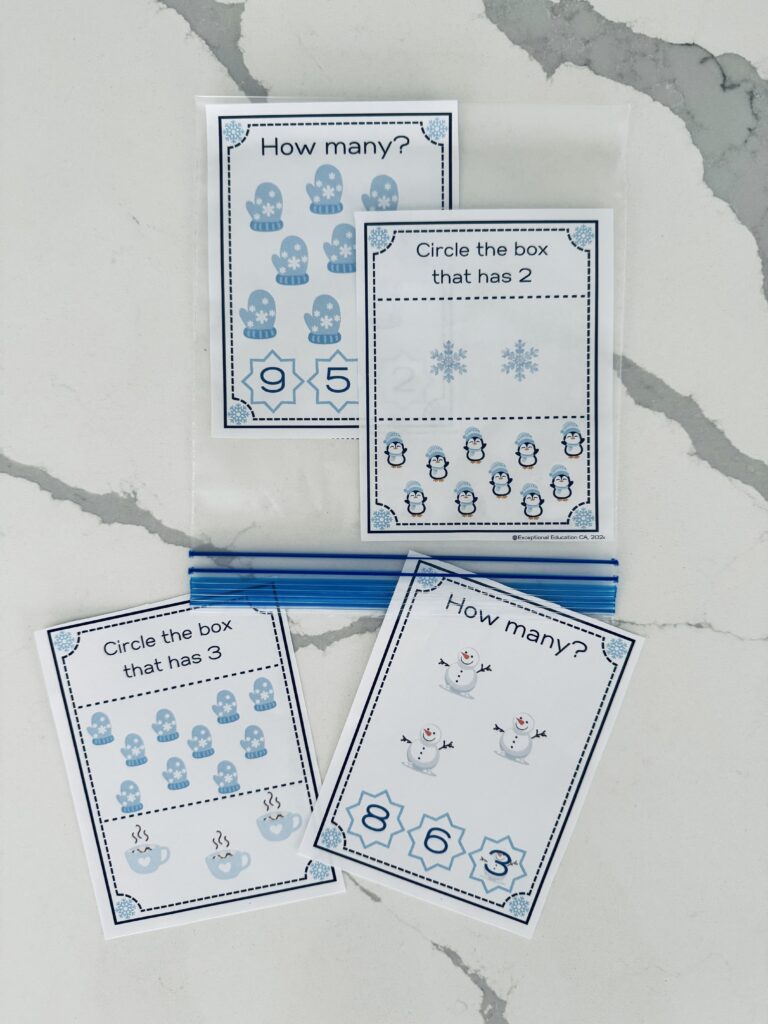
I tend to use the sandwich size ones to store extra visual schedule pieces, activity pieces, or various other little things that I tend to need and have no idea where to put.
The downside is that these are not as sturdy as some of the other storage options. In a pinch, however, I will use them because the other types of storage can get very costly.
How I Organize Task Boxes
One of the most important parts of a task box organization system is a way to label each task box, bag, or bin. As we discussed earlier, it is important for students to be able to find the tasks they need to work on independently.
There are several ways that you can label your task box activities.
Start with organizing your space
I start with a station in the room for each subject. Each station gets its own colour. This allows students to know where to go for a math activity, a language activity, etc.
Next, organize by subject
Once the area is established, I label each task box with either a different number, letter, or symbol of the same colour as the subject.
Then, incorporate independent work stations
Students will have their own task strip (something like a visual schedule) which indicates which activities they are to complete during their work session.
This usually happens in an independent work station, but can also work in centers or for early finishers.
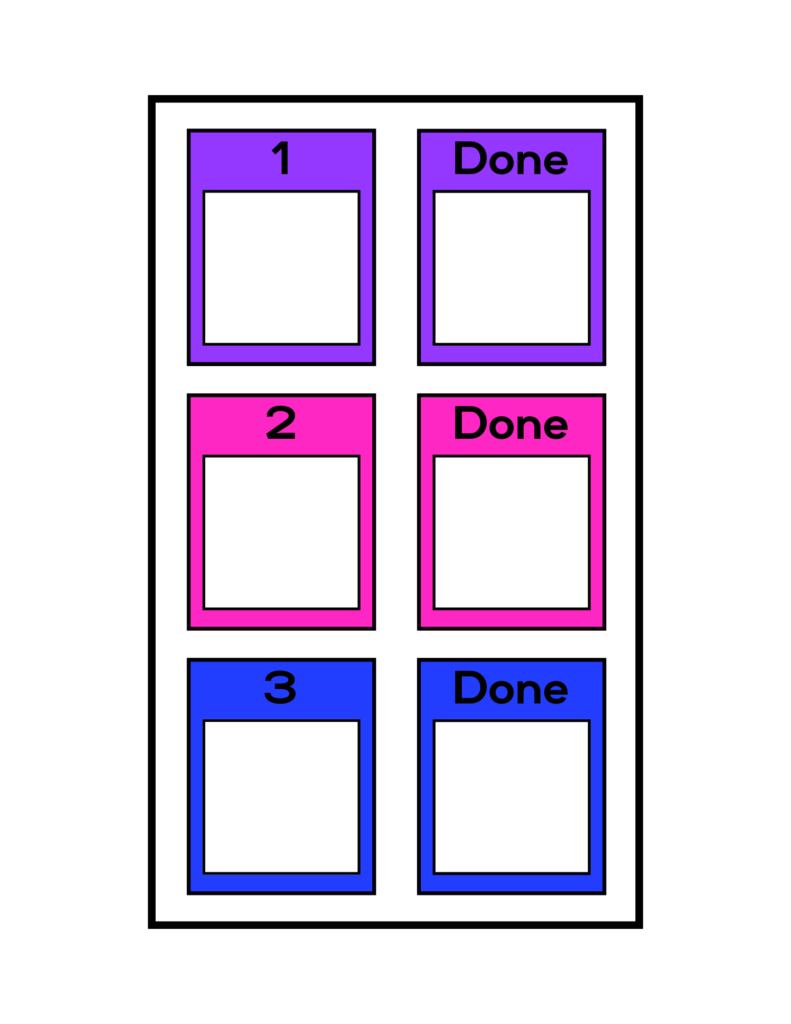
The task strip that I use looks like this. I have students who complete up to 6 activities in their independent work block. In each numbered box I will place a velcro tag of a symbol, letter, or number that corresponds with a task box activity in the classroom.
Students know that they start with the first activity, go to the shelf with that activity, find the box with that symbol or letter, and take the box back to their station.
When the activity is completed, students put the small symbol from their task strip over to the “done” column, put the box back on the shelf, and move on to the next task.
Setting it up is worth the time
It can take some time at the beginning of the year to set up this system and teach it to students.
Once they know what to do, however, it makes things much more smooth as you are going through your day.
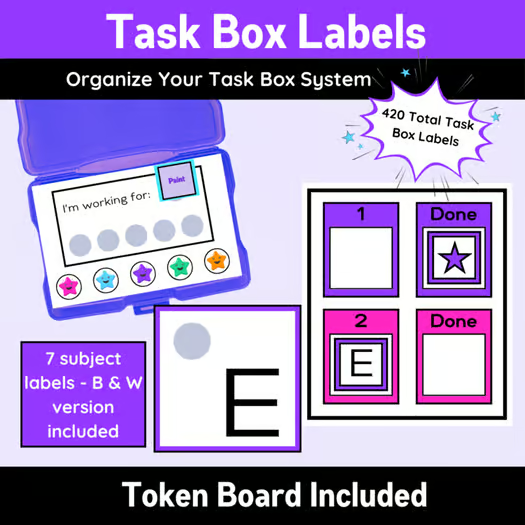
This is the task box organization label set that I use. I have created one that I sell in my TPT shop. If you are interested in this set, you can find it here.
What are Independent Work Stations?
We have briefly discussed independent work stations. Watch out for an upcoming post where I will discuss these in much more detail. You can sign up for weekly newsletters containing updates, resources, and freebies here!
In Summary…
It can seem daunting to set up a task box system in your classroom. Especially if you are new to the classroom or to special education.
I have found things get much easier once you have the system in place and your students know exactly how to use the system.
If you have any questions or suggestions on things you would love to read about in upcoming posts, please reach out to me! I am always happy to hear from you!